You are looking for a diagram creation program like Microsoft Visio but free of charge. Dia released under the GPL license can meet your requirement. Dia is an editor for diagrams, graphs, charts ... There is support for UML static structure diagrams (class diagrams), Entity-Relationship diagrams, network diagrams and much more. Diagrams can be exported to postscript and many other formats. It is available to install in Ubuntu Linux via apt.

sudo apt-get install dia


Currently, I'm using this tool to create ER diagrams. It provides a nice, easy-to-use interface with many various functions. You can read more from Internet to know how to use this free package.

Read more!

Firstly, you have to check if your Firefox supports Flash player. You can do that by opening directly any page including a Flash like Adobe site to know if it works well. Another way is that you can check what installed plugins in your Firefox. I have run these commands in Ubuntu Linux for checking Flash plugin.

1. Test a page with a Flash inside

firefox www.adobe.com/shockwave/welcome/

2. Check installed plugins
firefox about:plugins

If the Flash plugin is not yet installed on your system, you can use this code to install it easily.
sudo aptitude update
sudo aptitude install flashplugin-nonfree

Now you can try again and see what is result in your Firefox.
If the problem isn't fixed yet, please continue to read this post.

Read more!

Now that you know how to move from a working directory to another or to move around the filesystem of your Ubuntu Linux by using cd command. Today, we are going to learn how to list information about files and directories. To do this, we will learn a new command named ls which stands for list.

ls

This is the basic "ls" command, with no options. It provides a very basic listing of the files in your current working directory. Filenames beginning with a decimal are considered hidden files, and they are not shown.

ls -a

The -a option tells the ls command to report information about all files, including hidden files.

ls -l

The -l option tells the ls command to provide a long listing of information about the files and directories it reports. The long listing will provide important information about file permissions, user and group ownership, file size, and creation date.

ls -al

This command provides a long listing of information about all files in the current directory. It combines the functionality of the -a and -l options. This is probably the most used version of the ls command.

ls -al /usr

This command lists long information about all files in the /usr directory.

ls -ld /usr

Rather than list the files contained in the /usr directory, this command lists information about the /usr directory itself (without generating a listing of the contents of /usr). This is very useful when you want to check the permissions of the directory, and not the files the directory contains.

Read more!

Last command shows you how to print the working directory. Today, I will show you how to change from your working directory to another one. To do this, enter cd (stand for change directory) followed by the pathname of the desired working directory. Pathnames can be specified in one of two different ways; absolute pathnames or relative pathnames.

For examples:

cd /usr

This command moves you to the "/usr" directory and this directory becomes your current working directory.

cd /home/vntutor
Moves you to the /home/vntutor directory.

cd ..
Moves you to the parent directory of your working directory (in this case to be /home directory)

cd vntutor
Moves you to the sub directory of your working directory (in this case, /home/vntutor directory is sub directory of the /home directory)

cd
Issuing the cd command without any arguments moves you to your home directory.

Read more!

In Linux system, the working directory is known as the directory which you are standing. When you first log on to a Linux system, the working directory is set to your home directory. To know the name of the working directory, use the pwd command. The following example shows me that I'm standing in directory /home/me


Now, clear the terminal screen by using clear command, and this is the result.


Go back to read more please!

Read more!

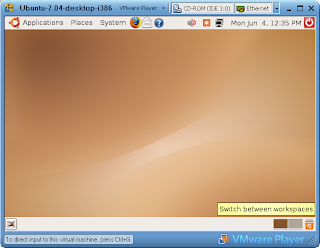
As I have presented in last post, the installation of VMware Player on WinXP is easily done in some simple steps. Today, we will study how to run a VMware appliance on Windows using VMware Player. In this case, I will run the latest version of Ubuntu Linux. At the time when I'm writing this post, the latest version of Ubuntu Linux is Feisty 7.04.

Step 1: download image of Feisty 7.04
In this example, I have downloaded Ubuntu Desktop 7.04 for i386 . However, you can try with any image of Ubuntu Linux from this list.

Step 2: open VMware player
Goto Start -> Programs -> VMware -> VMware Player
Leave the choice on Create and click "OK" (asked only in the first time)

Ubuntu will start up ...

Step 3: try Ubuntu Feisty in your virtual machine
Click inside VMware Player to use your machine and hit Ctrl-Alt to get back out

Do you like it? Now, you can try Linux or evaluate any Linux software applications quickly without installation any thing because the virtual machines are independent platform.

Please go back to read more on this topic presented in some next parts. Thanks for your reading!

Resources: vmware, ubuntu

Read more!

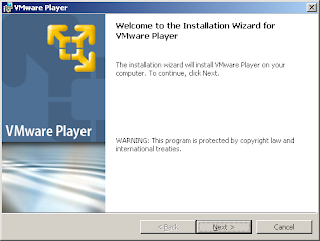
An introduction to virtual machines in last post presented some basic terms such as virtualization, virtual machines, virtual hardwares. The function of VMware player was also touched upon. Today, we start to install this free application on our Windows machines.

Step 1: Download VMware Player 2.0
Go to http://www.vmware.com/download/player/ to download the latest version of VMware Player freely. (It takes 10 to 15 minutes for downloading)

Spep 2: Install VMware Player 2.0

  • Double click on executable file (VMware-player-2.0.0-45731.exe) to start installation


  • Click "Next" to continue

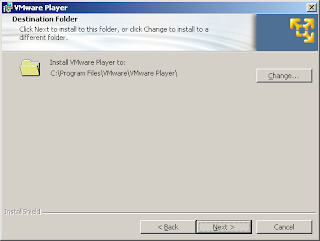
  • Click "Next" to install VMware Player to the default folder

  • Click "Next" and then click "Install" to start installation

  • Click "Finish" to complete your installation successfully.
Step 3: Check the installation
Goto Start -> Programs -> VMware -> VMware Player

I will tell you how to run an appliance in VMware Player in next part.

Read more!

Virtualization is an abstraction layer that decouples the physical hardware from the operating system to deliver greater IT resource utilization and flexibility. This term is divided into two main parts to be named platform virtualization and resource virtualization. Here, we will talk about the first one which involves simulation of virtual machines. As a real machine, a virtual machine has its own set of virtual hardware (e.g., RAM, CPU, NIC, etc.) upon which an operating system and applications are loaded. Virtual machines are encapsulated into files, making it possible to rapidly save, copy and provision a virtual machine.

VMware is known as one of global leaders in virtual infrastructure software for industry-standard systems. With VMware Player application, you can run any virtual machine created by VMware Server or VMware Workstation which was released in version 6.0 some days ago. Nowadays, a lot of software applications packaged along within an operating system with virtual machines called VMware appliances which are available at the VMware Virtual Appliance Marketplace, an official online library of virtual appliances.

This technology has opened a new approach in software engineering. We have been using this technology to try our applications as well as deliver them to our clients who need to see a demonstration of the application quickly without install any additional packages. I will write more details about this technology in next posts, so please go back to read it.

Resources: VMWare

Read more!

Ubuntu provides a very clean and simple look desktop without any icons. This post will present how to add some icons such as My Computer, User's Home, ..

Step 1: launch a configuration editor
Hit Alt-F2 and type gconf-editor into Run application dialog and click Run

Step 2: select icons which you prefer
Select "apps" from the left pane; then select "nautilus" and "desktop." In the right pane, you can choose any icons which will be seen on the desktop. For example, I want show icons for my computer and home directory, so I have checked on onptions like the following picture.

And this is the result on my desktop.


Read more!